License plate recognition for cameras with a built-in analytics module is configured in the device's own web interface. You can read about how to access the camera's web interface in the camera manual.
On the camera's web interface, perform the following actions:
1. For Ivideon 8450Z-ASD, iDS-2CD7A26G0/P-IZHS, and iDS-2CD7A46G0/P-IZHS cameras:
1. Go to Configuration > System > System Settings > Metadata Parameters and check the ANPR box. | 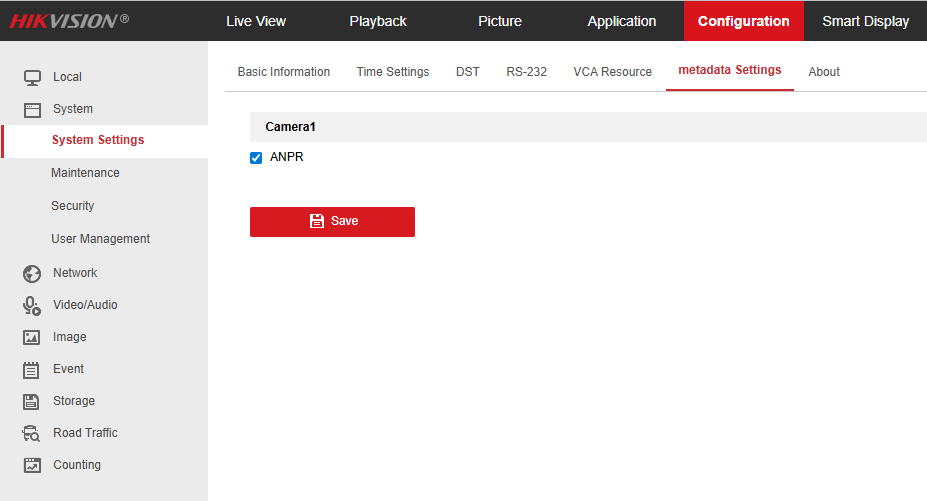 |
2. Go to Configuration > Network > Advanced Settings > Platform Access and enable the option Platform Access Mode - Third-party Services. | 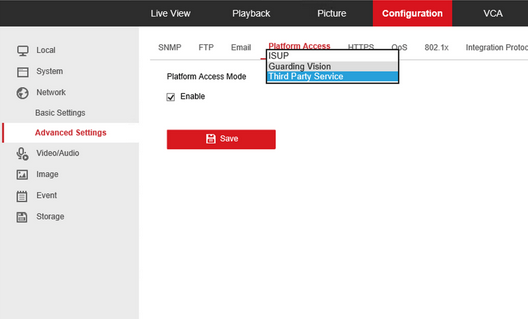 |
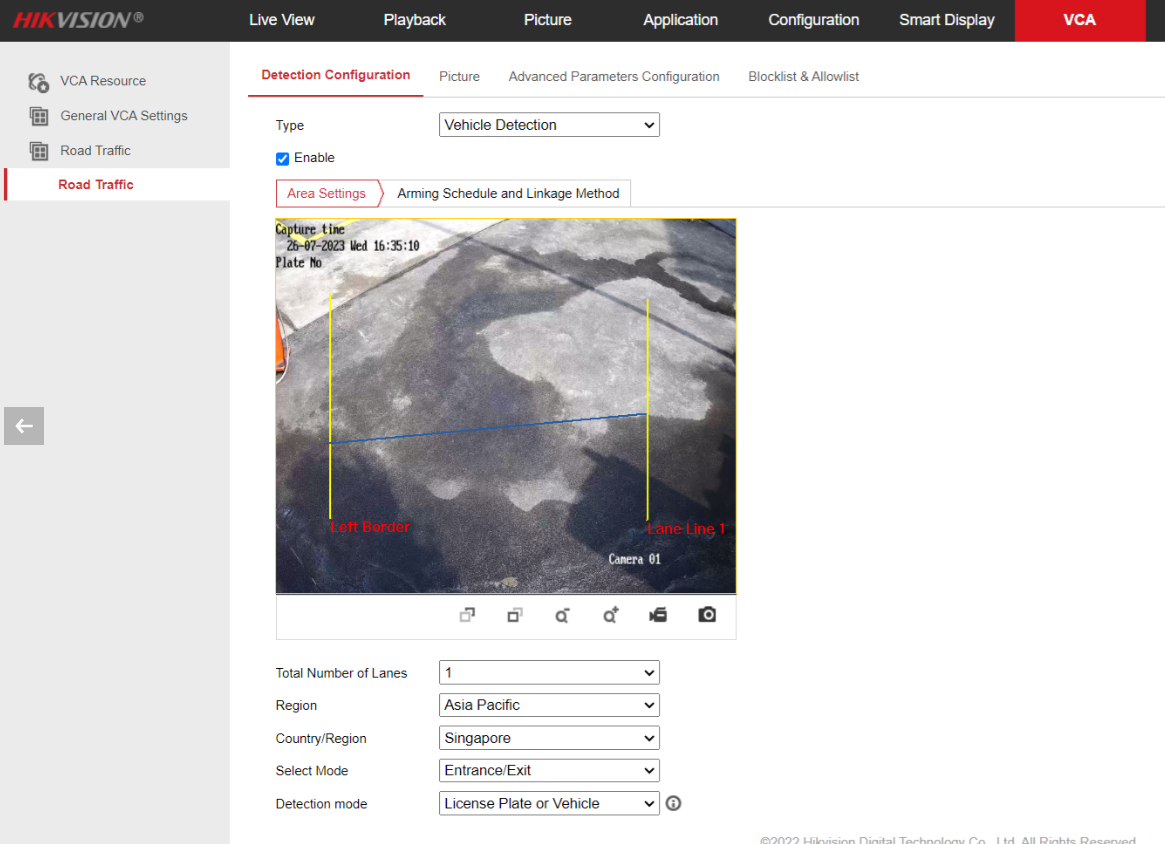
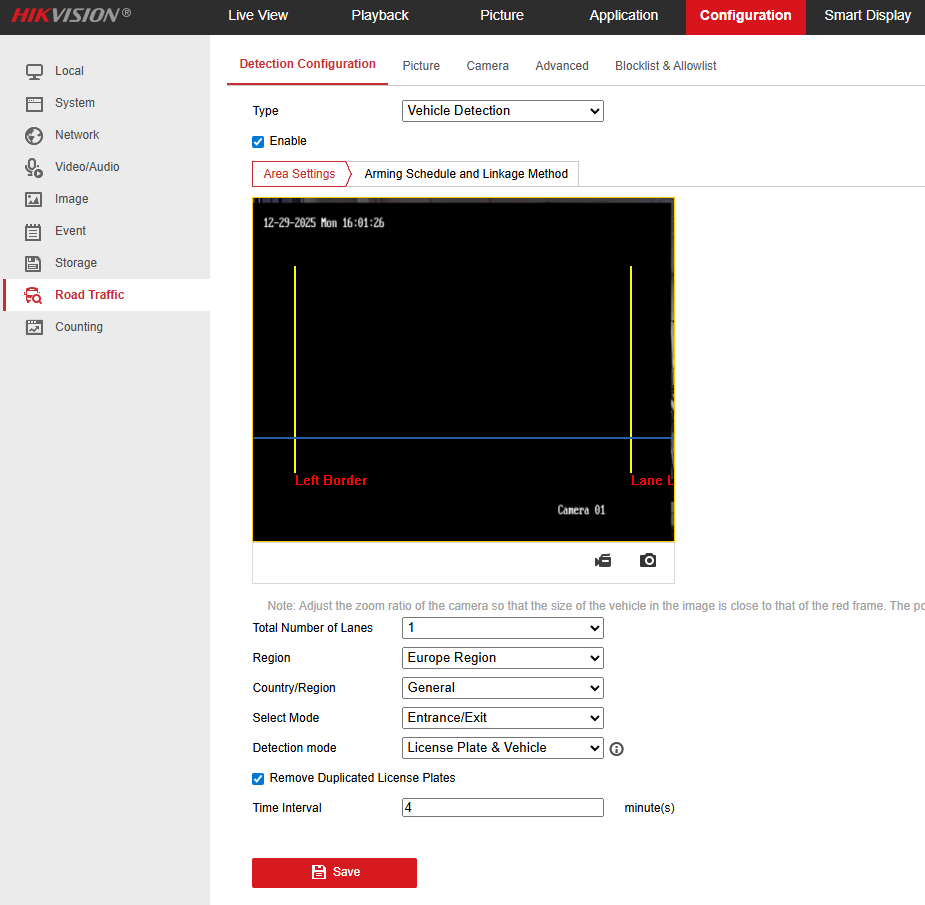
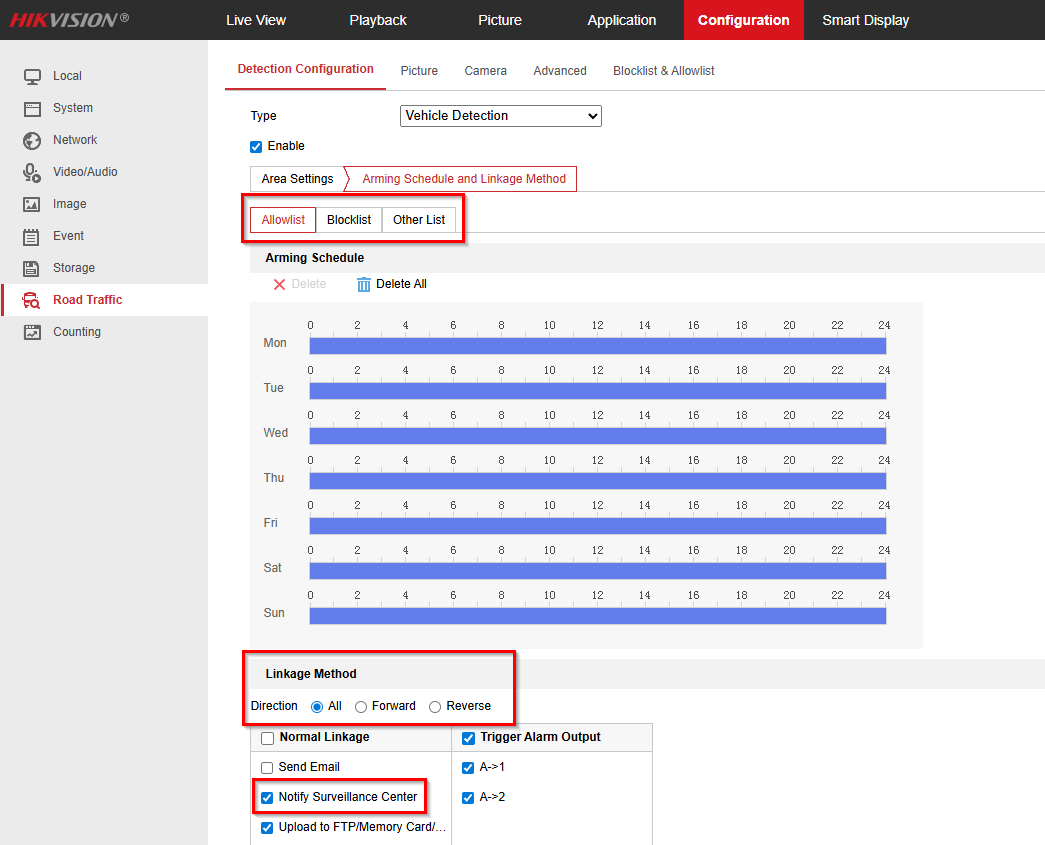
3. Go to the VCA > VCA Resource section and check the Road Traffic box. 4. Go to Road Traffic > Road Traffic > Detection Configuration and make the following changes: In the Type section, select the Vehicle Detection option Enable the analytics itself using the corresponding checkbox at the top of the section. In the Country/Region section, select General. In the Select Mode item, choose Entrance/ExitAlso, in this section, you need to set up the zone where the camera will detect vehicles. The recognition zone is defined by two vertical (yellow) lines and one horizontal (blue) line:
|
 |
5. Go to the Arming Schedule and Communication Method with Devices section. To send license plate detection information to the Ivideon, also make sure that sending information to the center is enabled as a reaction to an alarm in all lists (white list / black list / other list). | 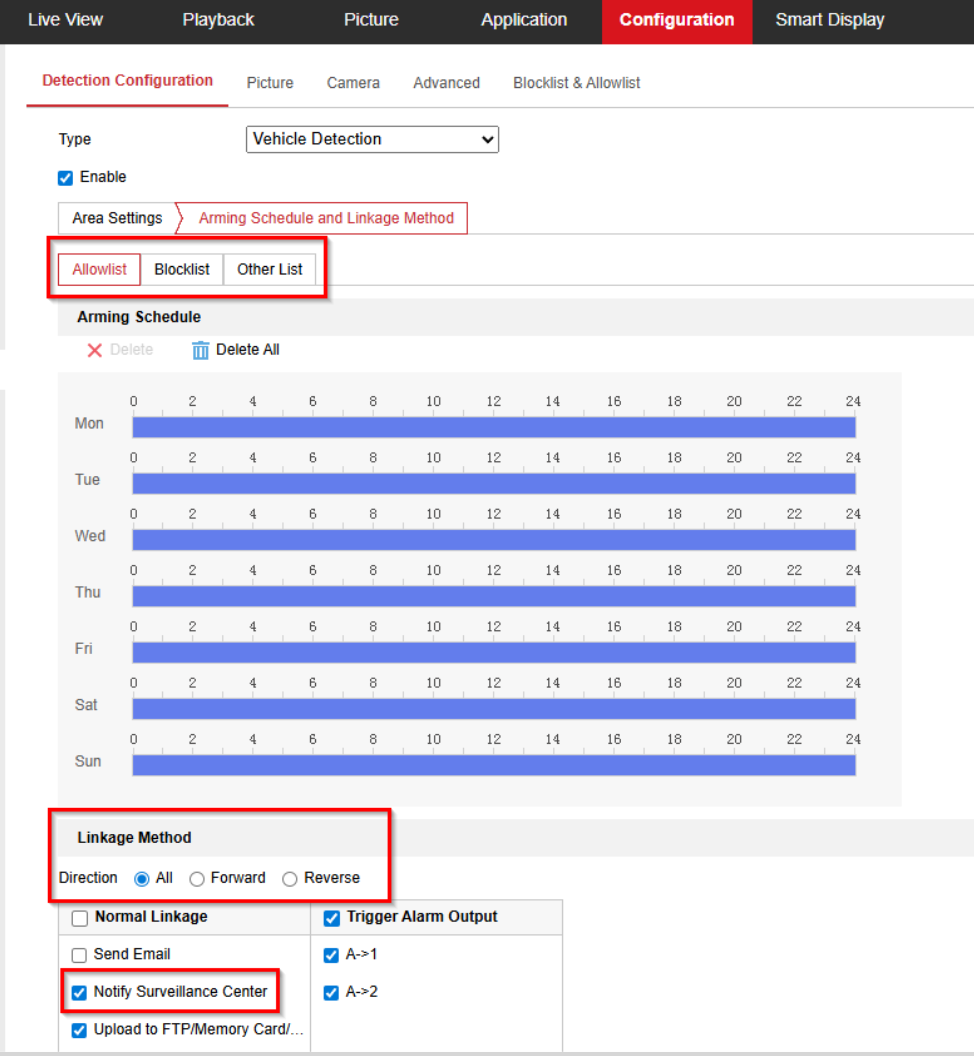 |
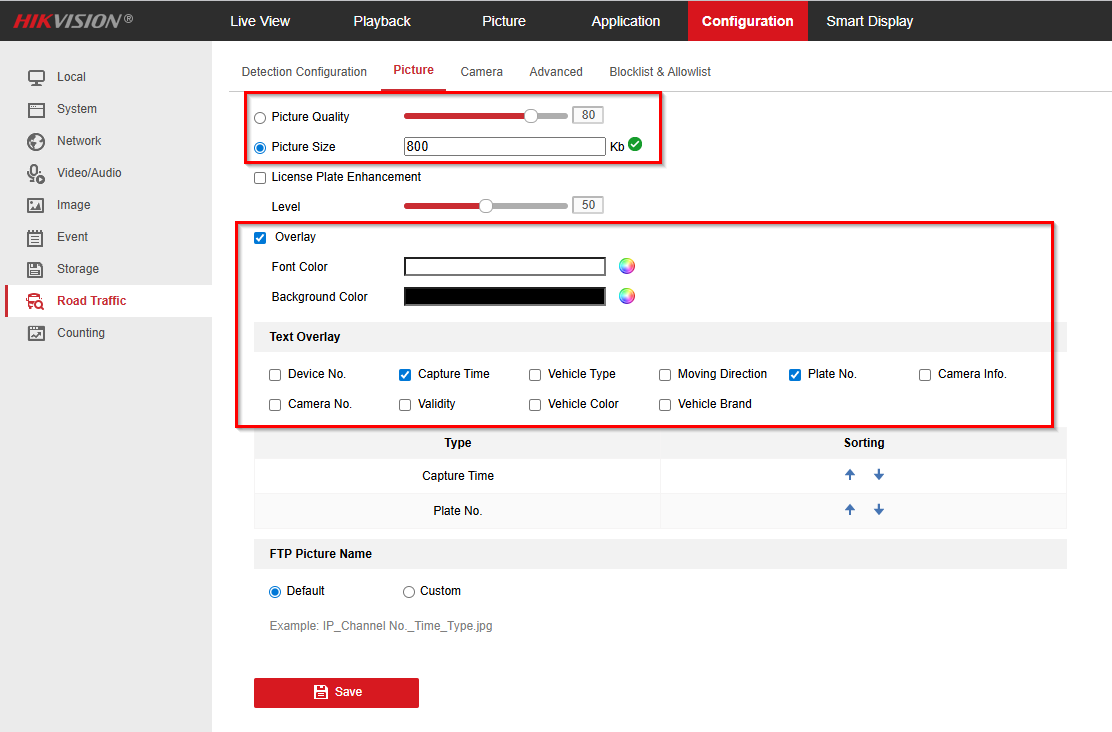
6. Go to Road Traffic > Picture and make the following changes:
| 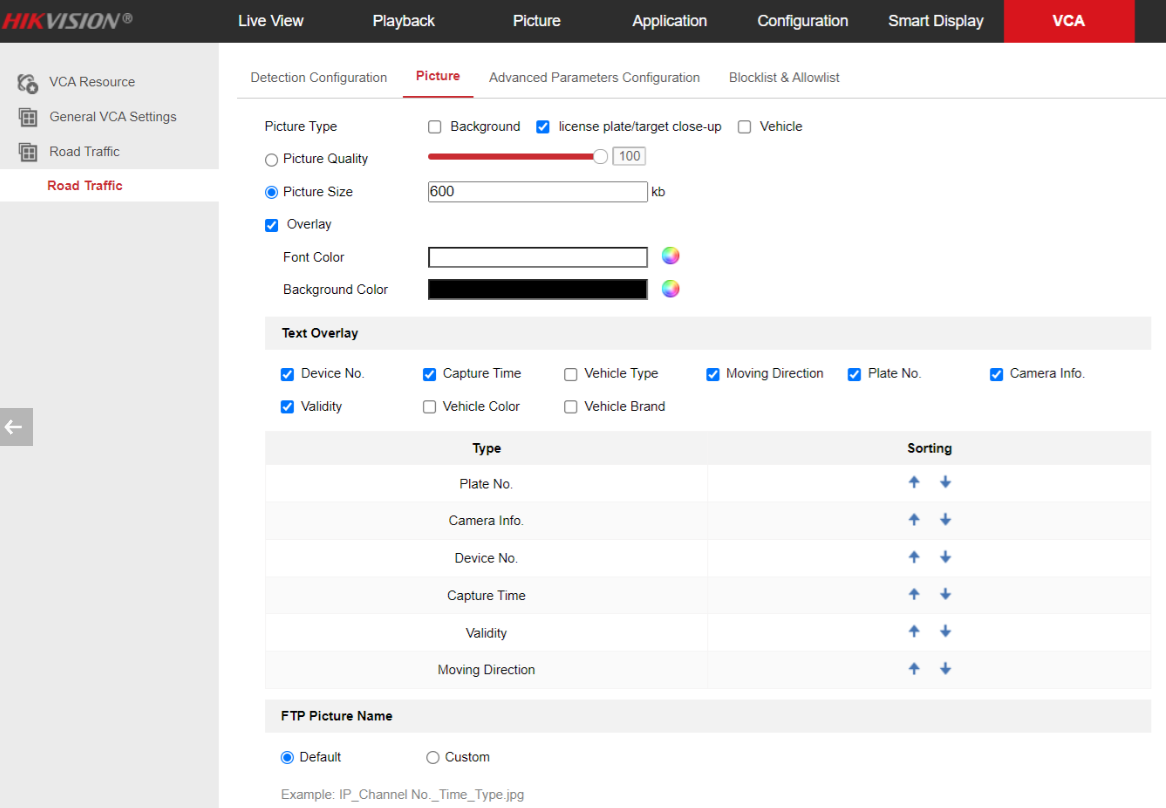 |
2. For DS-2CD7A26G0/P-IZHS, DS-2CD7A26G0/P-IV (up to 12 m), and DS-2CD7A26G0/P-IV (up to 25 m) cameras:
1. Go to Configuration > System > System Settings > Metadata Parameters and check the ANPR box. | |
2. Go to Configuration > Image > Display Settings and make the following changes:
If vehicles in the frame are moving at high speed, set the value to 1/500 or less.
| 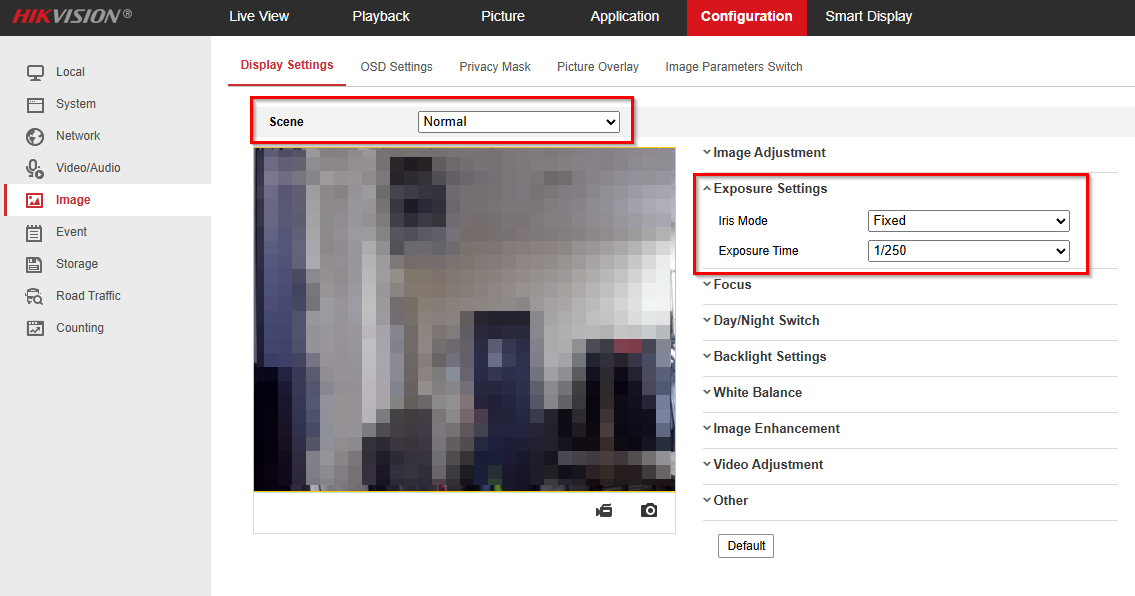   |
3. Go to Configuration > Road Traffic > Detection Configuration and make the following settings: Select the ANPR system operation Type - Vehicle Detection. Enable the analytics itself using the corresponding checkbox at the top of the section. In the Country/Region section, select your region. In the Select Mode item, choose Entrance/Exit.Also, in this section, you need to set up the zone where the camera will detect vehicles. The recognition zone is defined by two vertical (yellow) lines and one horizontal (blue) line:
|  |
4. Go to Configuration > Road Traffic > Picture and make the following changes:
|  |
5. If the camera is installed and configured correctly, new events with license plate recognition data will appear in real time in the Configuration > Road Traffic > Recognition Result section (or in the Smart Display section for iDS series cameras). The same events will be automatically transferred to the service and will be available in the personal account in the ANPR - Events section. | 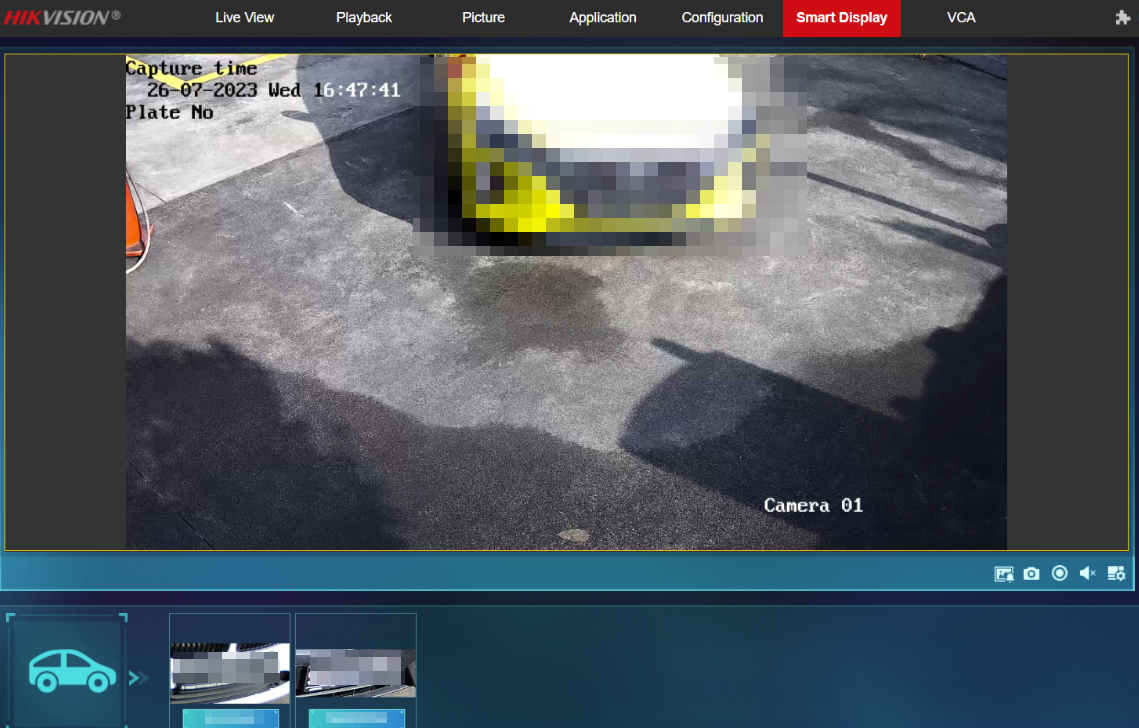 |
If the ANPR system needs to receive events only for vehicle entry/exit, it is sufficient to choose a specific event type in the camera settings.
|  |