
Currently, the connection of the iiko cash registers system is performed through Ivideon managers. Before connecting, please send a request to support@ivideon.com and wait for a response from our specialist.
The process of connecting Ivideon POS to iiko consists of several steps:
1. Generating an API Key in iikoWeb
To connect the integration, you first need to generate an API key in the iiko system:
1. Log in to your iikoWeb account. 2. In the "External Orders" block, click the "Live API Settings" button. | 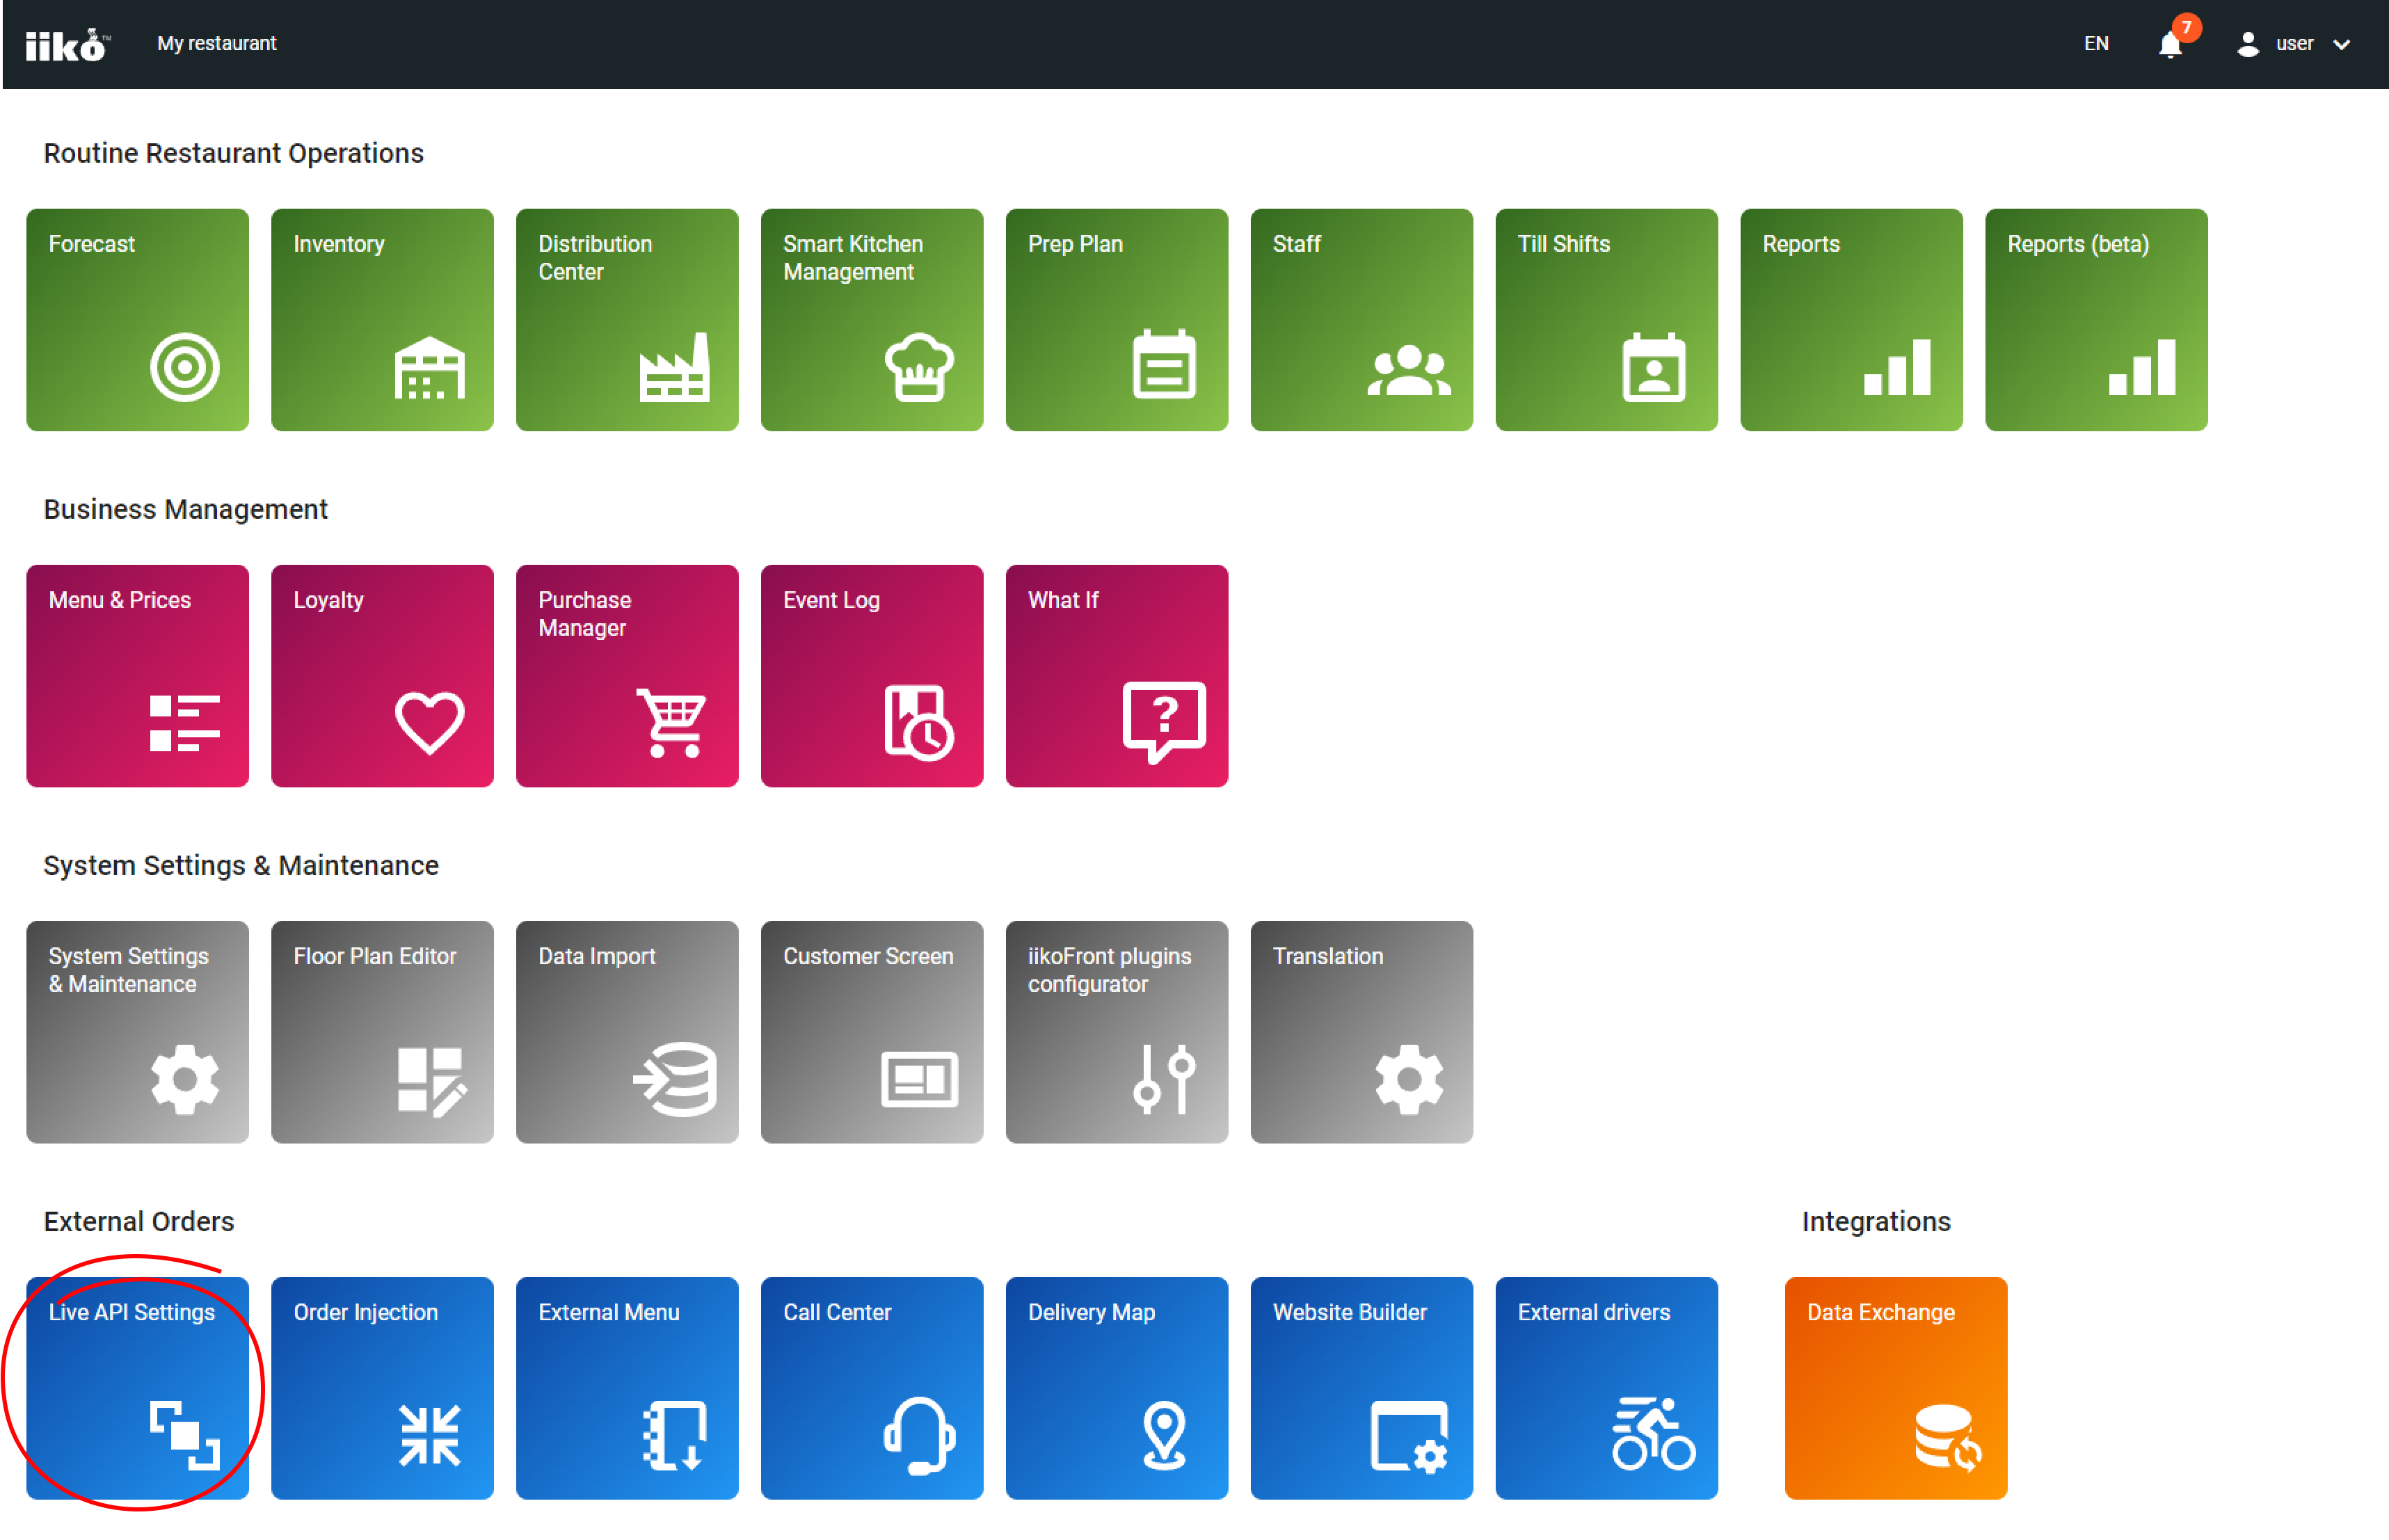 |
3. In the window that opens, click the "Add integration" button. | 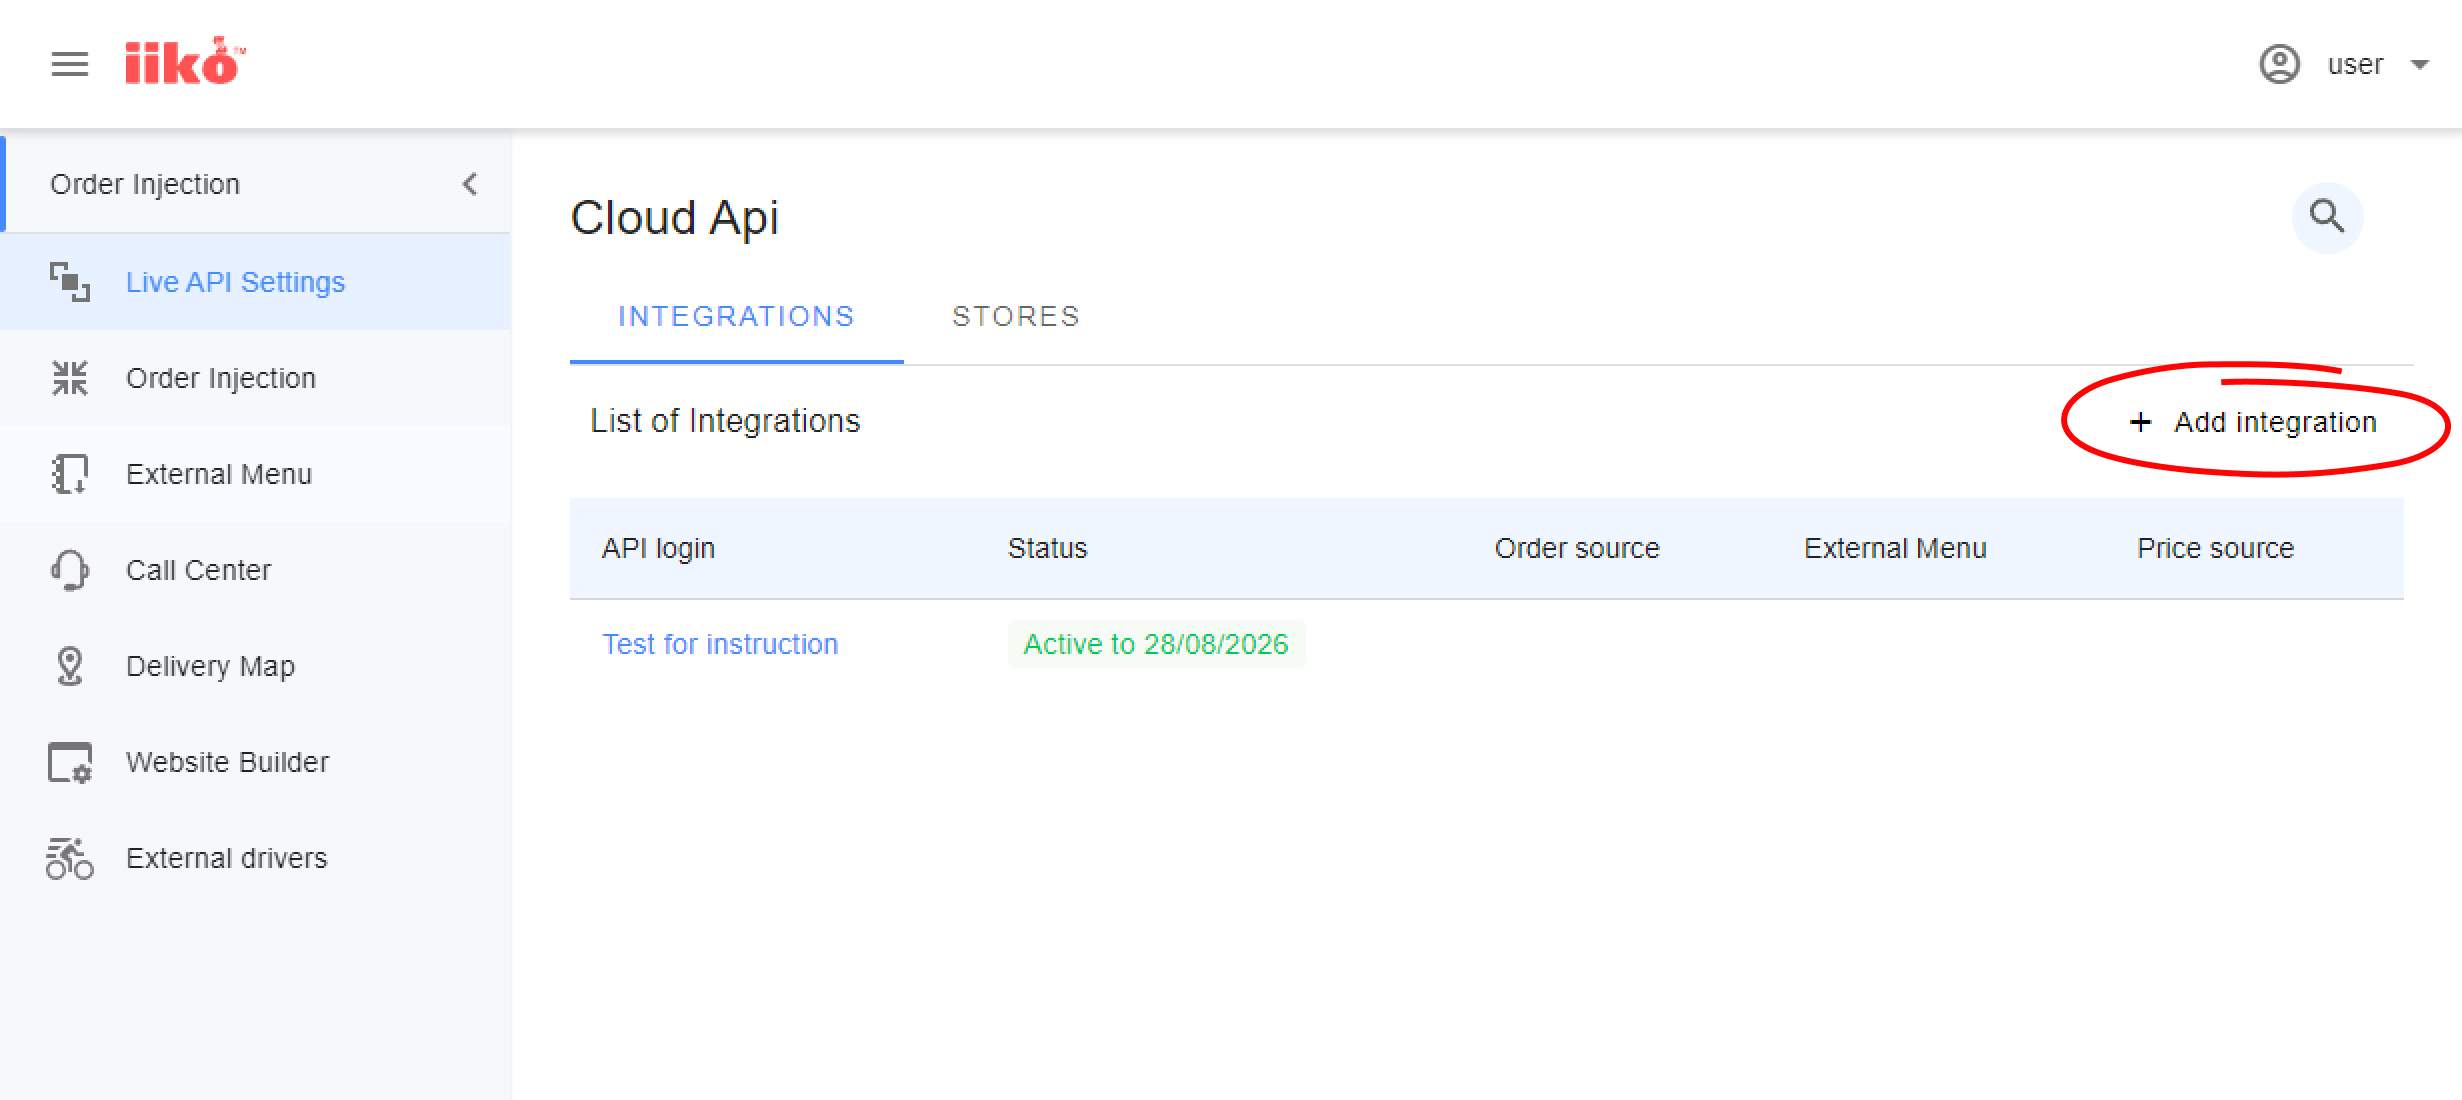 |
4. In the new integration form, fill in the following fields:
The API key will be generated automatically. Make sure the "Integration is active" checkbox is selected. | 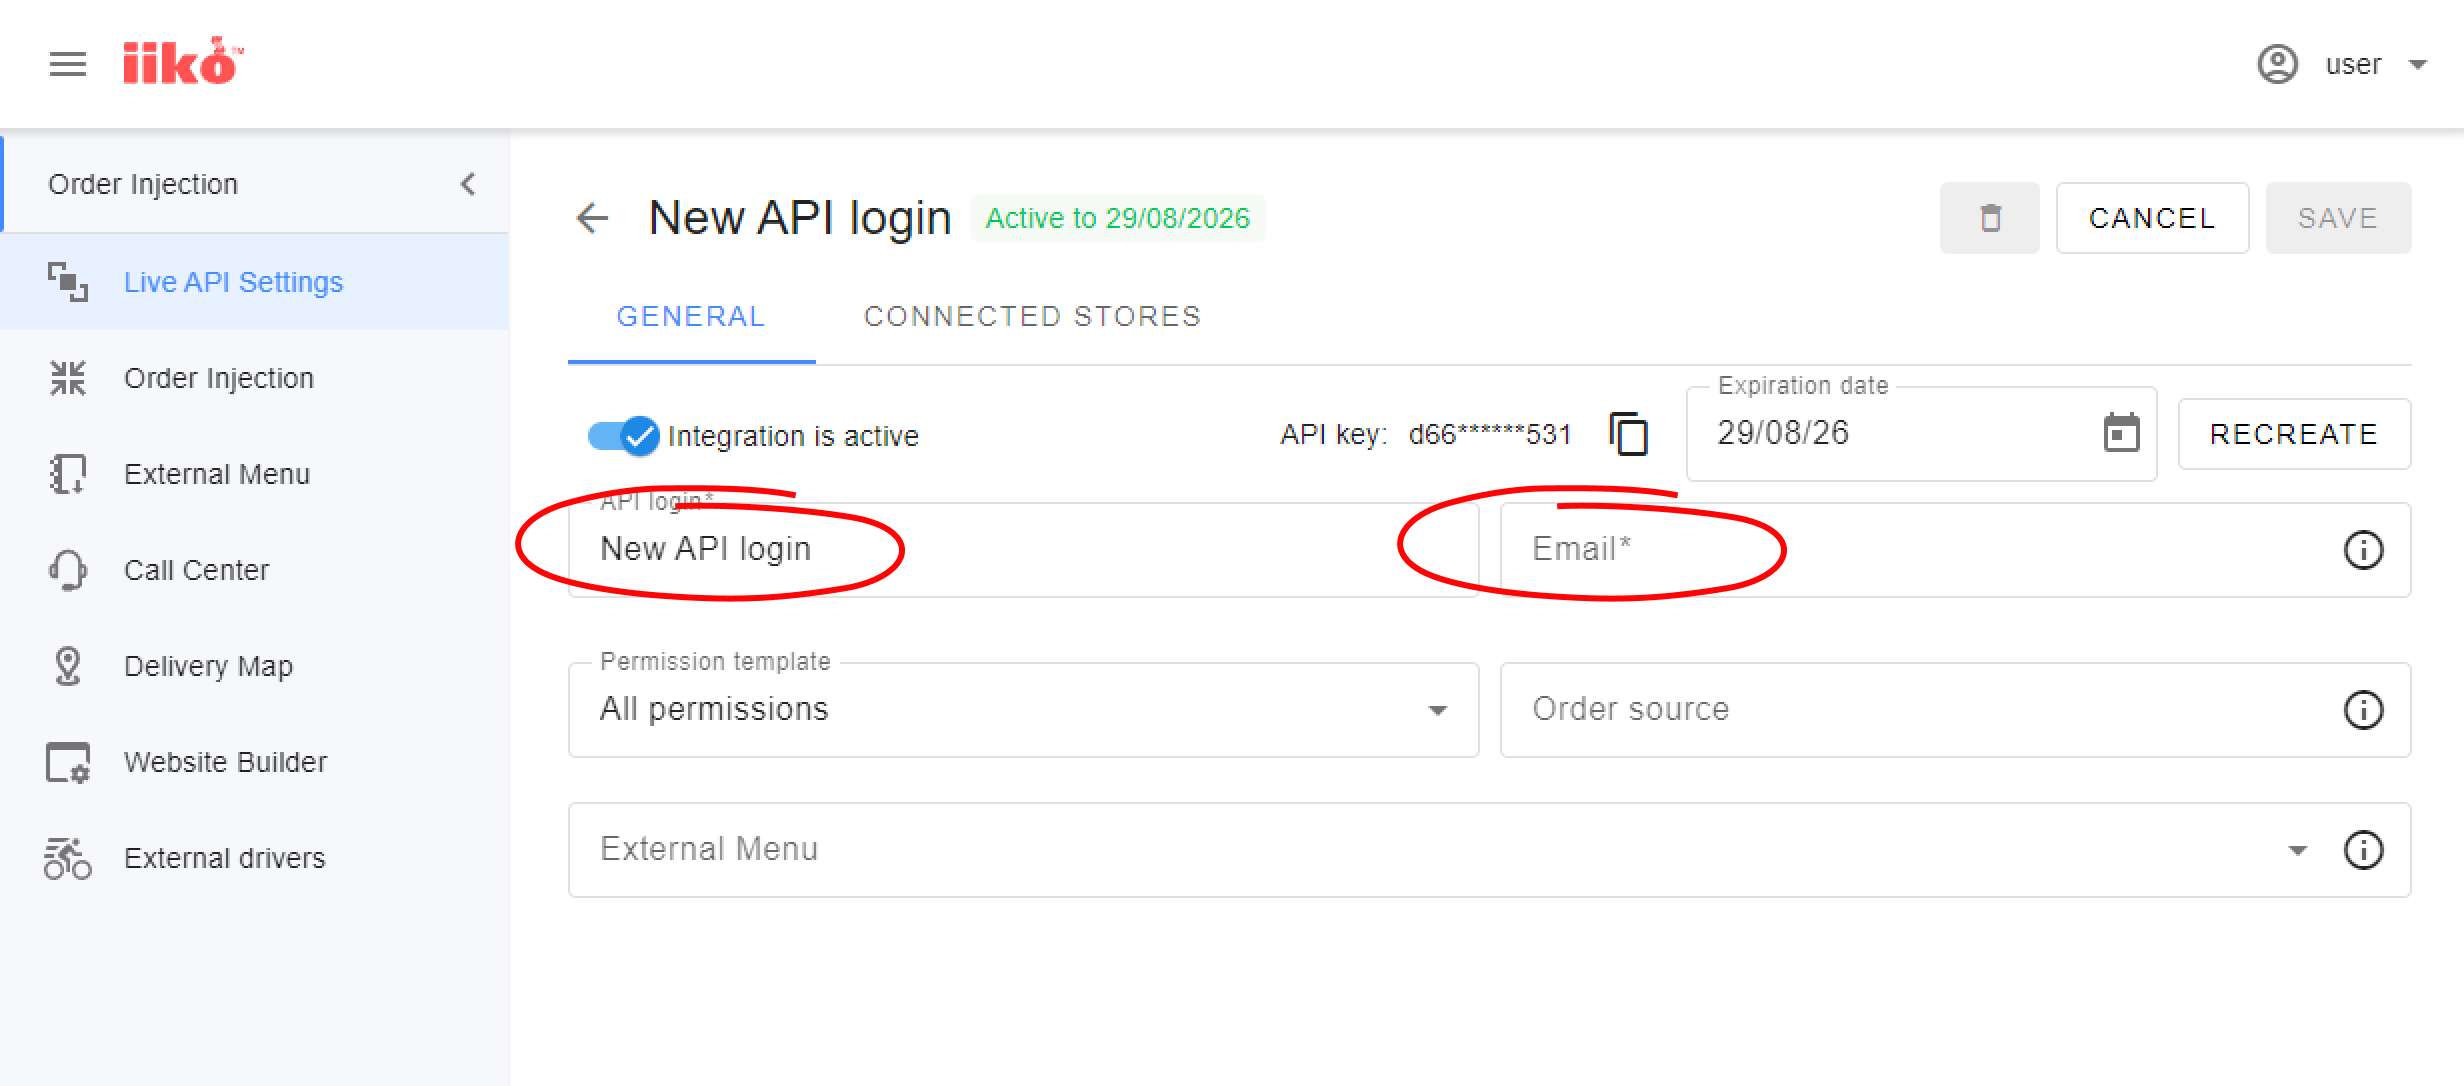 |
5. Connect the stores (locations) that will work with this key:
6. Click the "Save" button. Copy the generated API key — it will be required for connection in your Ivideon account. | 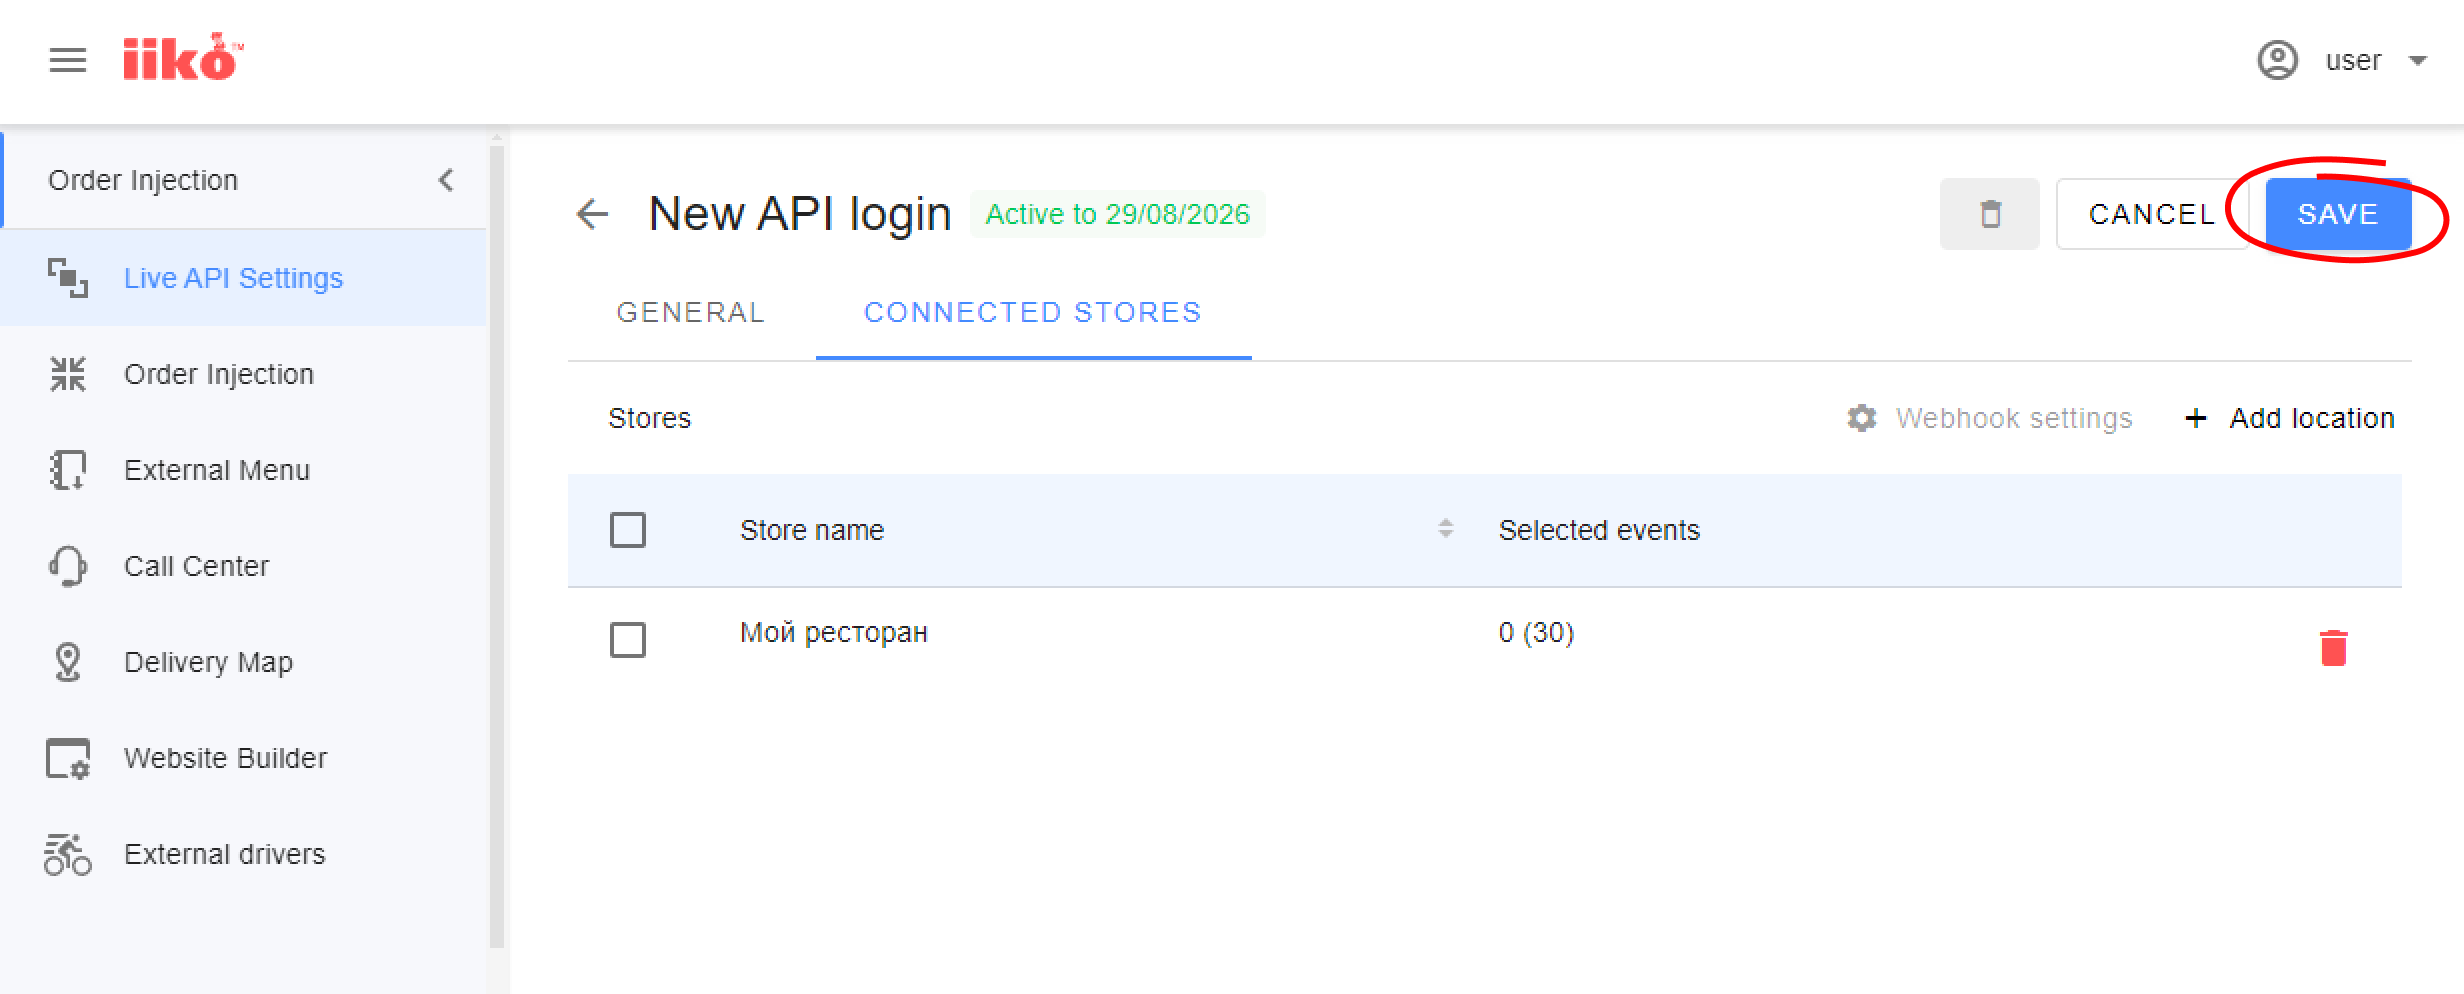 |
Generating an API Key
ng an API Key in iikoWeb
2. Connecting iiko in Ivideon Account
Next, you need to perform the following steps in your Ivideon account:
Connecting iiko to Ivideon Account
1. In your Ivideon account, go to the Cash registers section and select iiko from the list of the systems. 2. Review the brief instructions for obtaining an API key and enter the generated key in the corresponding field. 3. Click Add. The data synchronization will begin — the system will load information about your terminals, locations, and product range. If the synchronization is successful, you will be redirected to the "Settings" subsection to link cameras to terminals. If an error appears: "Failed to add API key. Please try again or contact technical support", — check that the API key is correct and repeat the connection process. | 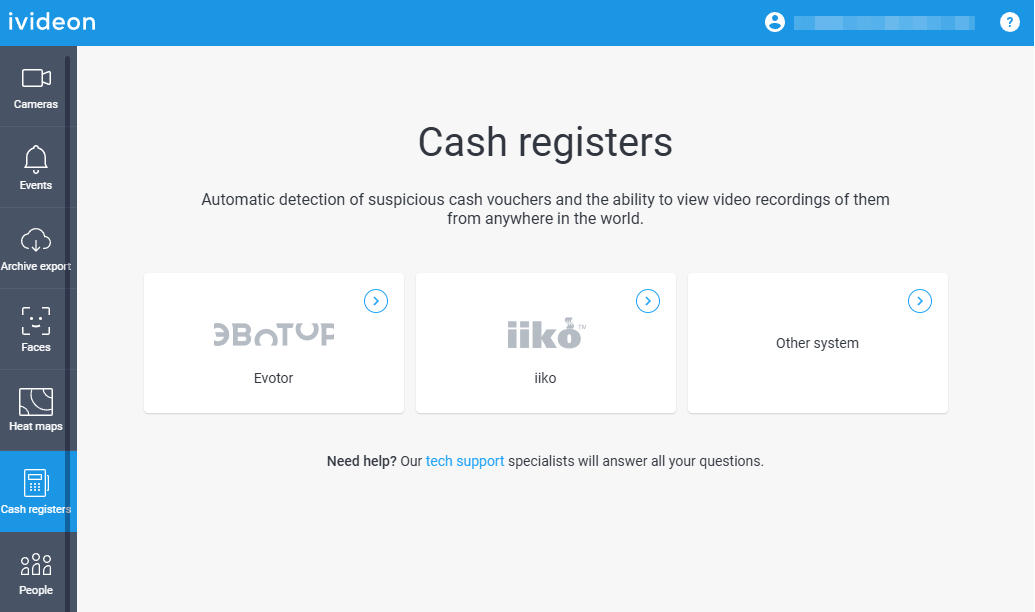 |